The how-to handbook
Follow these steps to build a mini biodigester that can light up a flame


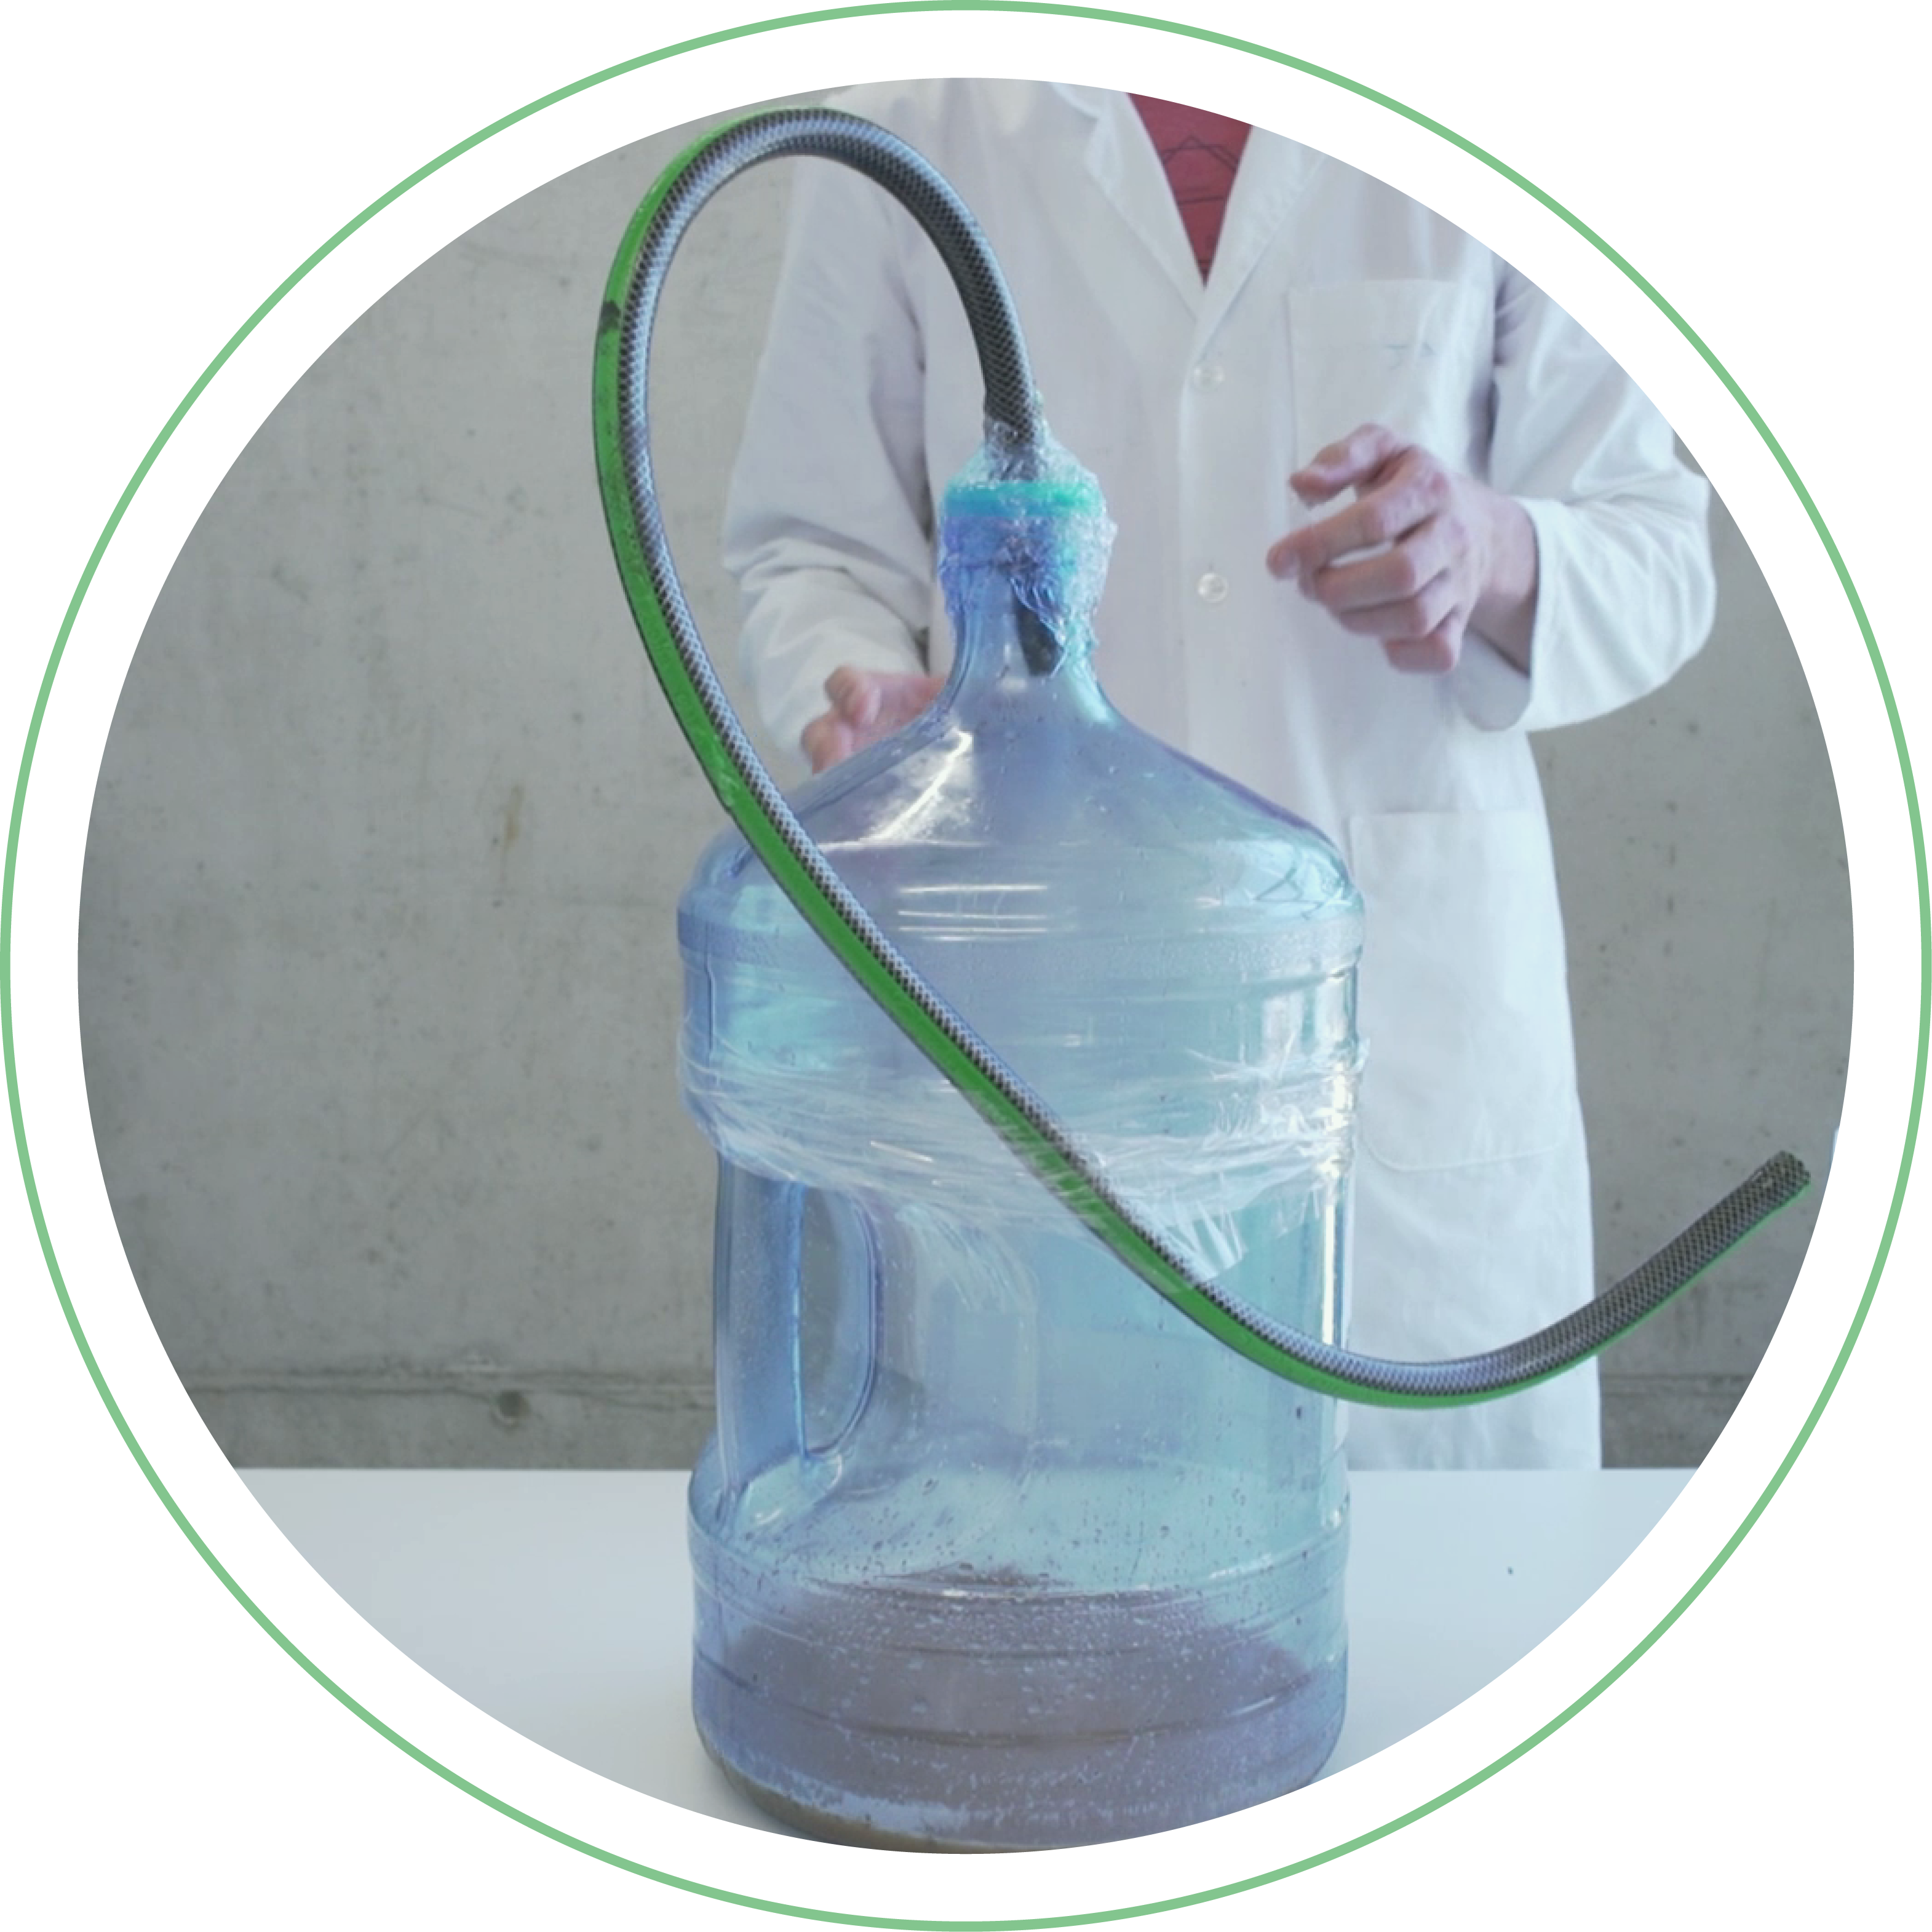
Step 1
Bioreactor
Mix the 6 kg of manure with the 6 L of water in the same proportion until everything is dissolved. Grab the 20 L water bottle and pass the tube through the lid, and glue it. Now, pour the manure mixture into the bottle and glue the lid, leaving a tiny piece of tube inside the bottle. Next, secure the rest of the tube to the bottle with tape so it doesn’t move and is at the right height.

Step 2
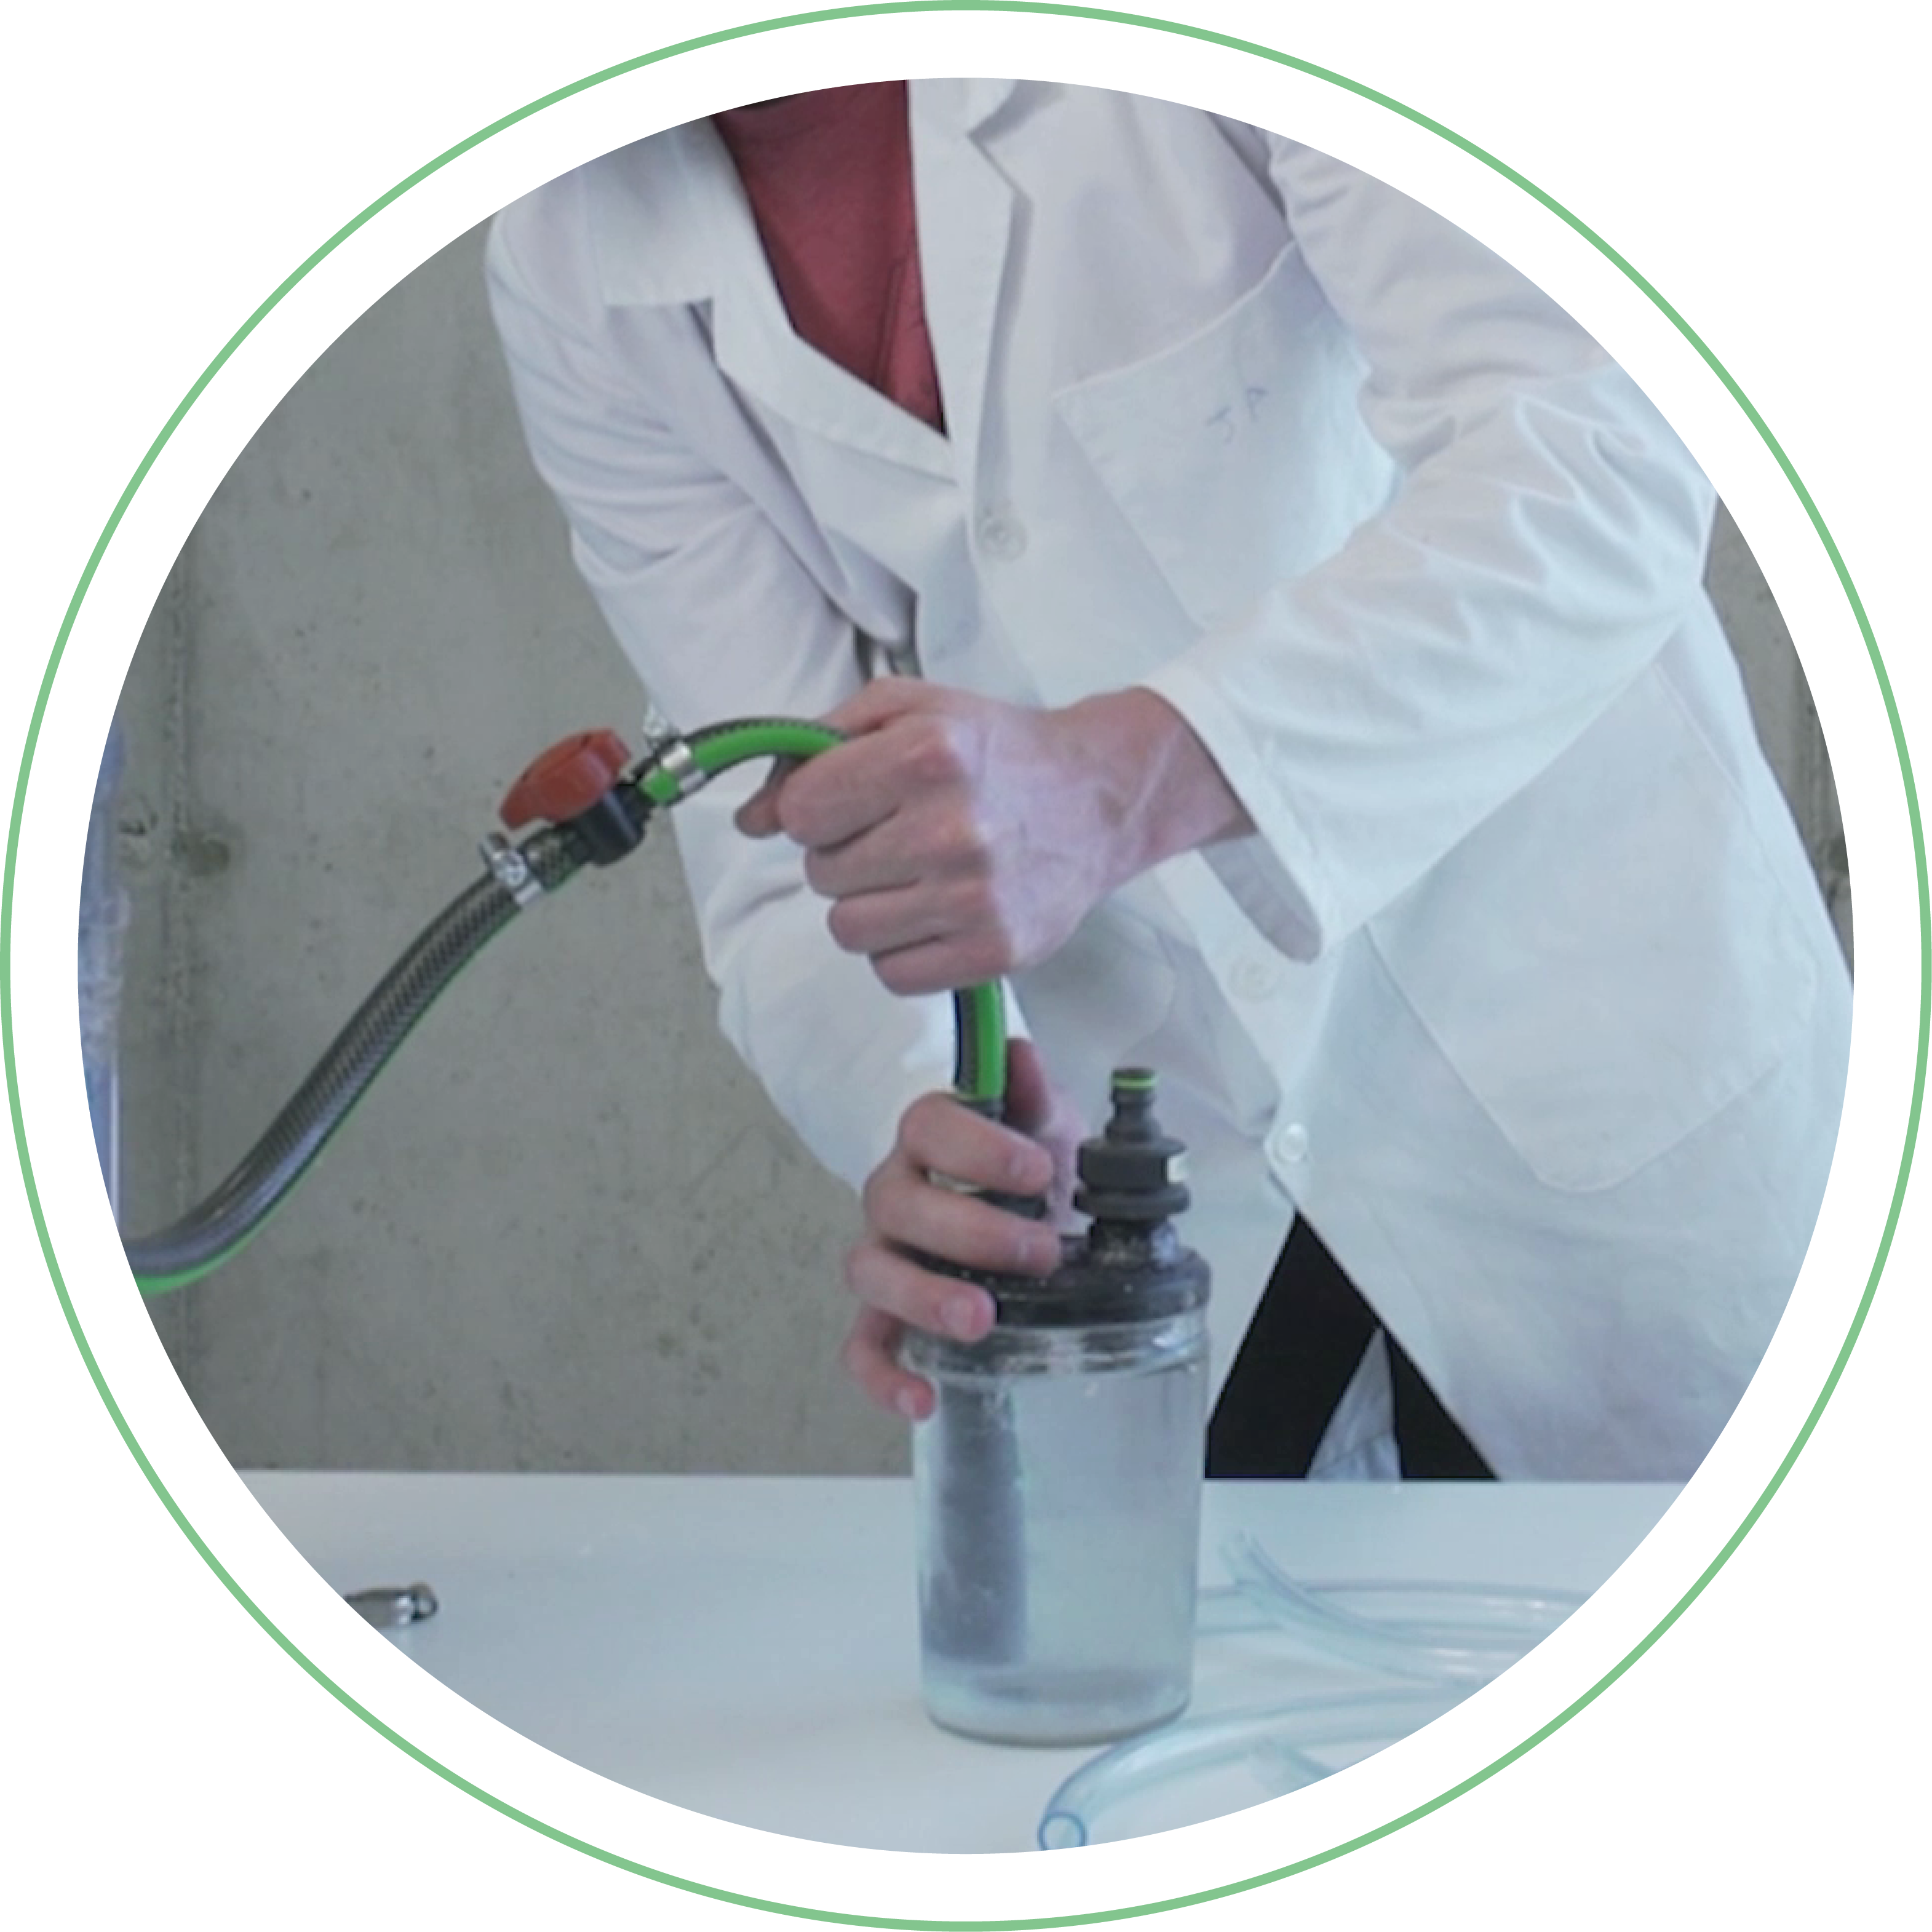
Carbon Dioxide filter or CO2 filte
Grab the glass jar and make two holes in the lid with the size of the male-male hose pipe connector using the drill with the crown drill bit attached. Make sure the connectors fit into the holes, and glue them with the silicone gun. In the inside of the lid, attach the female-female hose pipe connectors into the male ones and glue again to ensure it is secured. On the outside part of the lid, screw the female hose connectors into the male ones.
Cut a piece of the tube so that it fits the glass jar and insert it into one of the connectors from the inside part of the lid and secure it with glue. Fill the jar with 6 tablespoons of caustic soda and water to the top. Now you can close the jar, glue it so that it cannot be opened. This will serve as a Carbon Dioxide filter or CO2 filter, used to filter the CO2 in order to have more purified biogas and a better flame.
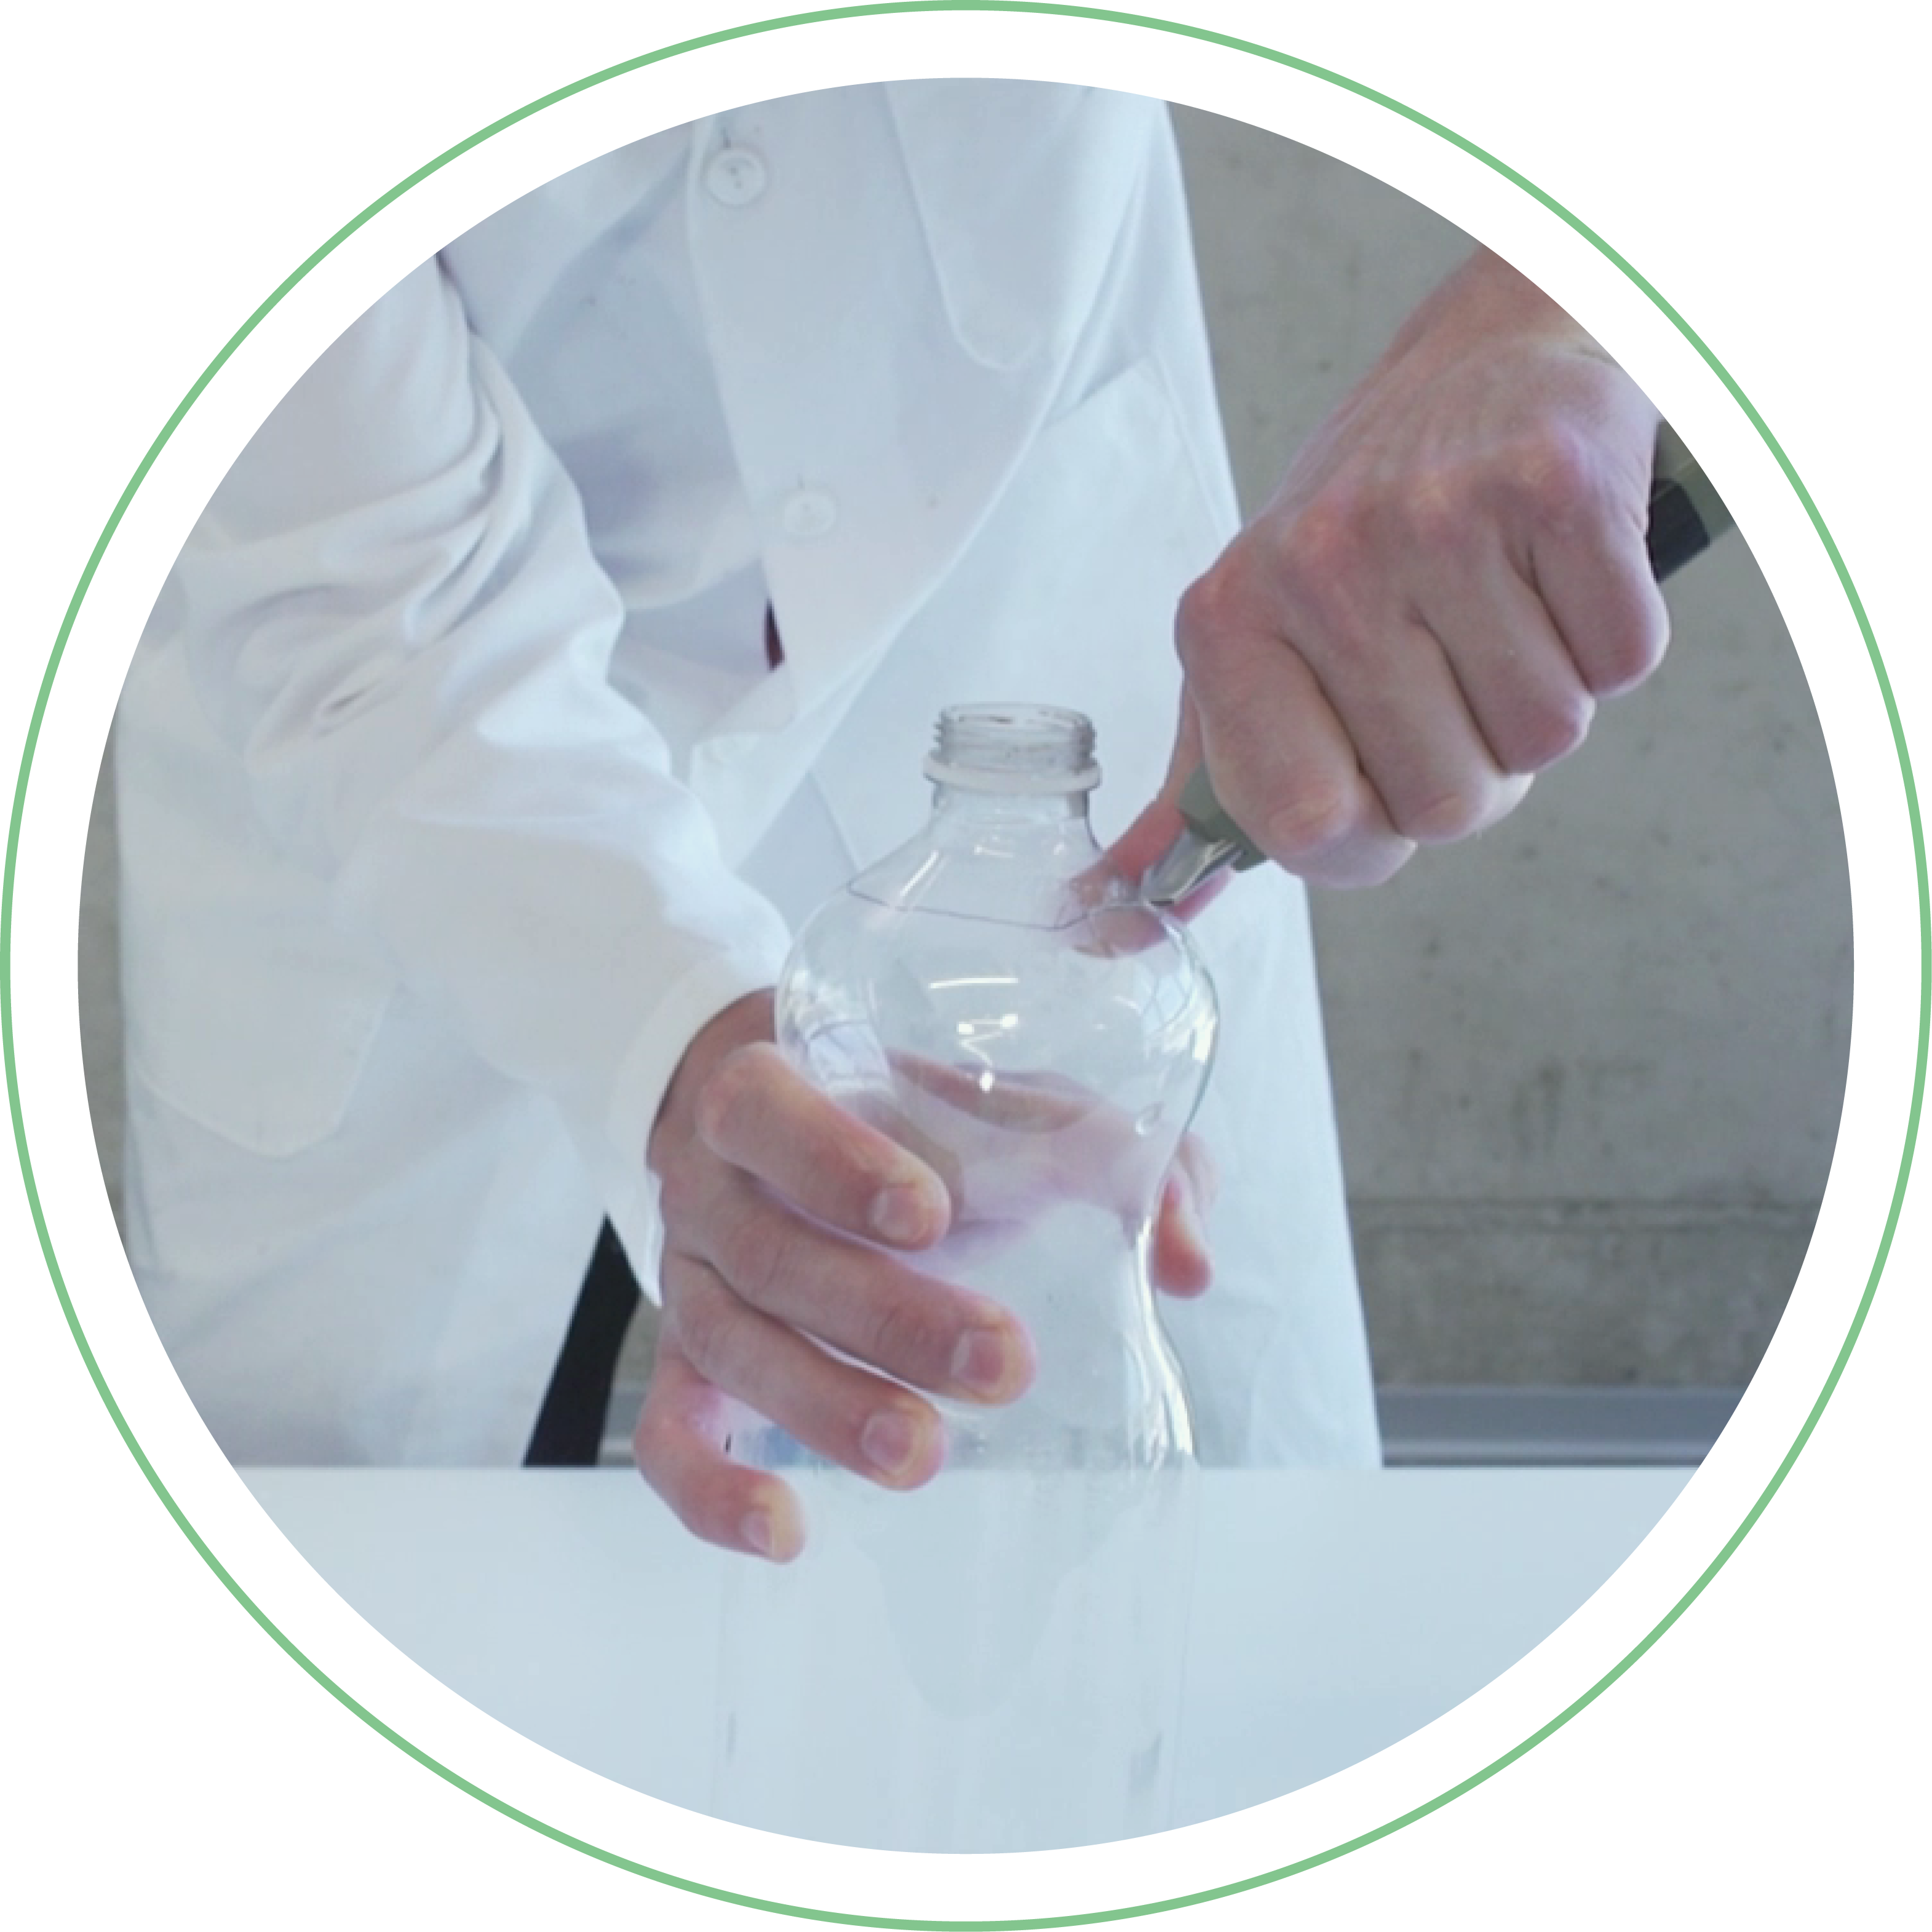
Step 3
Safety bottle
Grab the 1.5 L water bottle and cut off the top using the box cutter. Put that aside. This bottle will serve as a safety component, because it will be filled with water and one of the ends of the tubes will be submerged there. If the gas comes out with a lot of pressure, there will be bubbles, warning that the air chamber is full, so it has to be changed to collect more biogas.
Step 4
Assembling
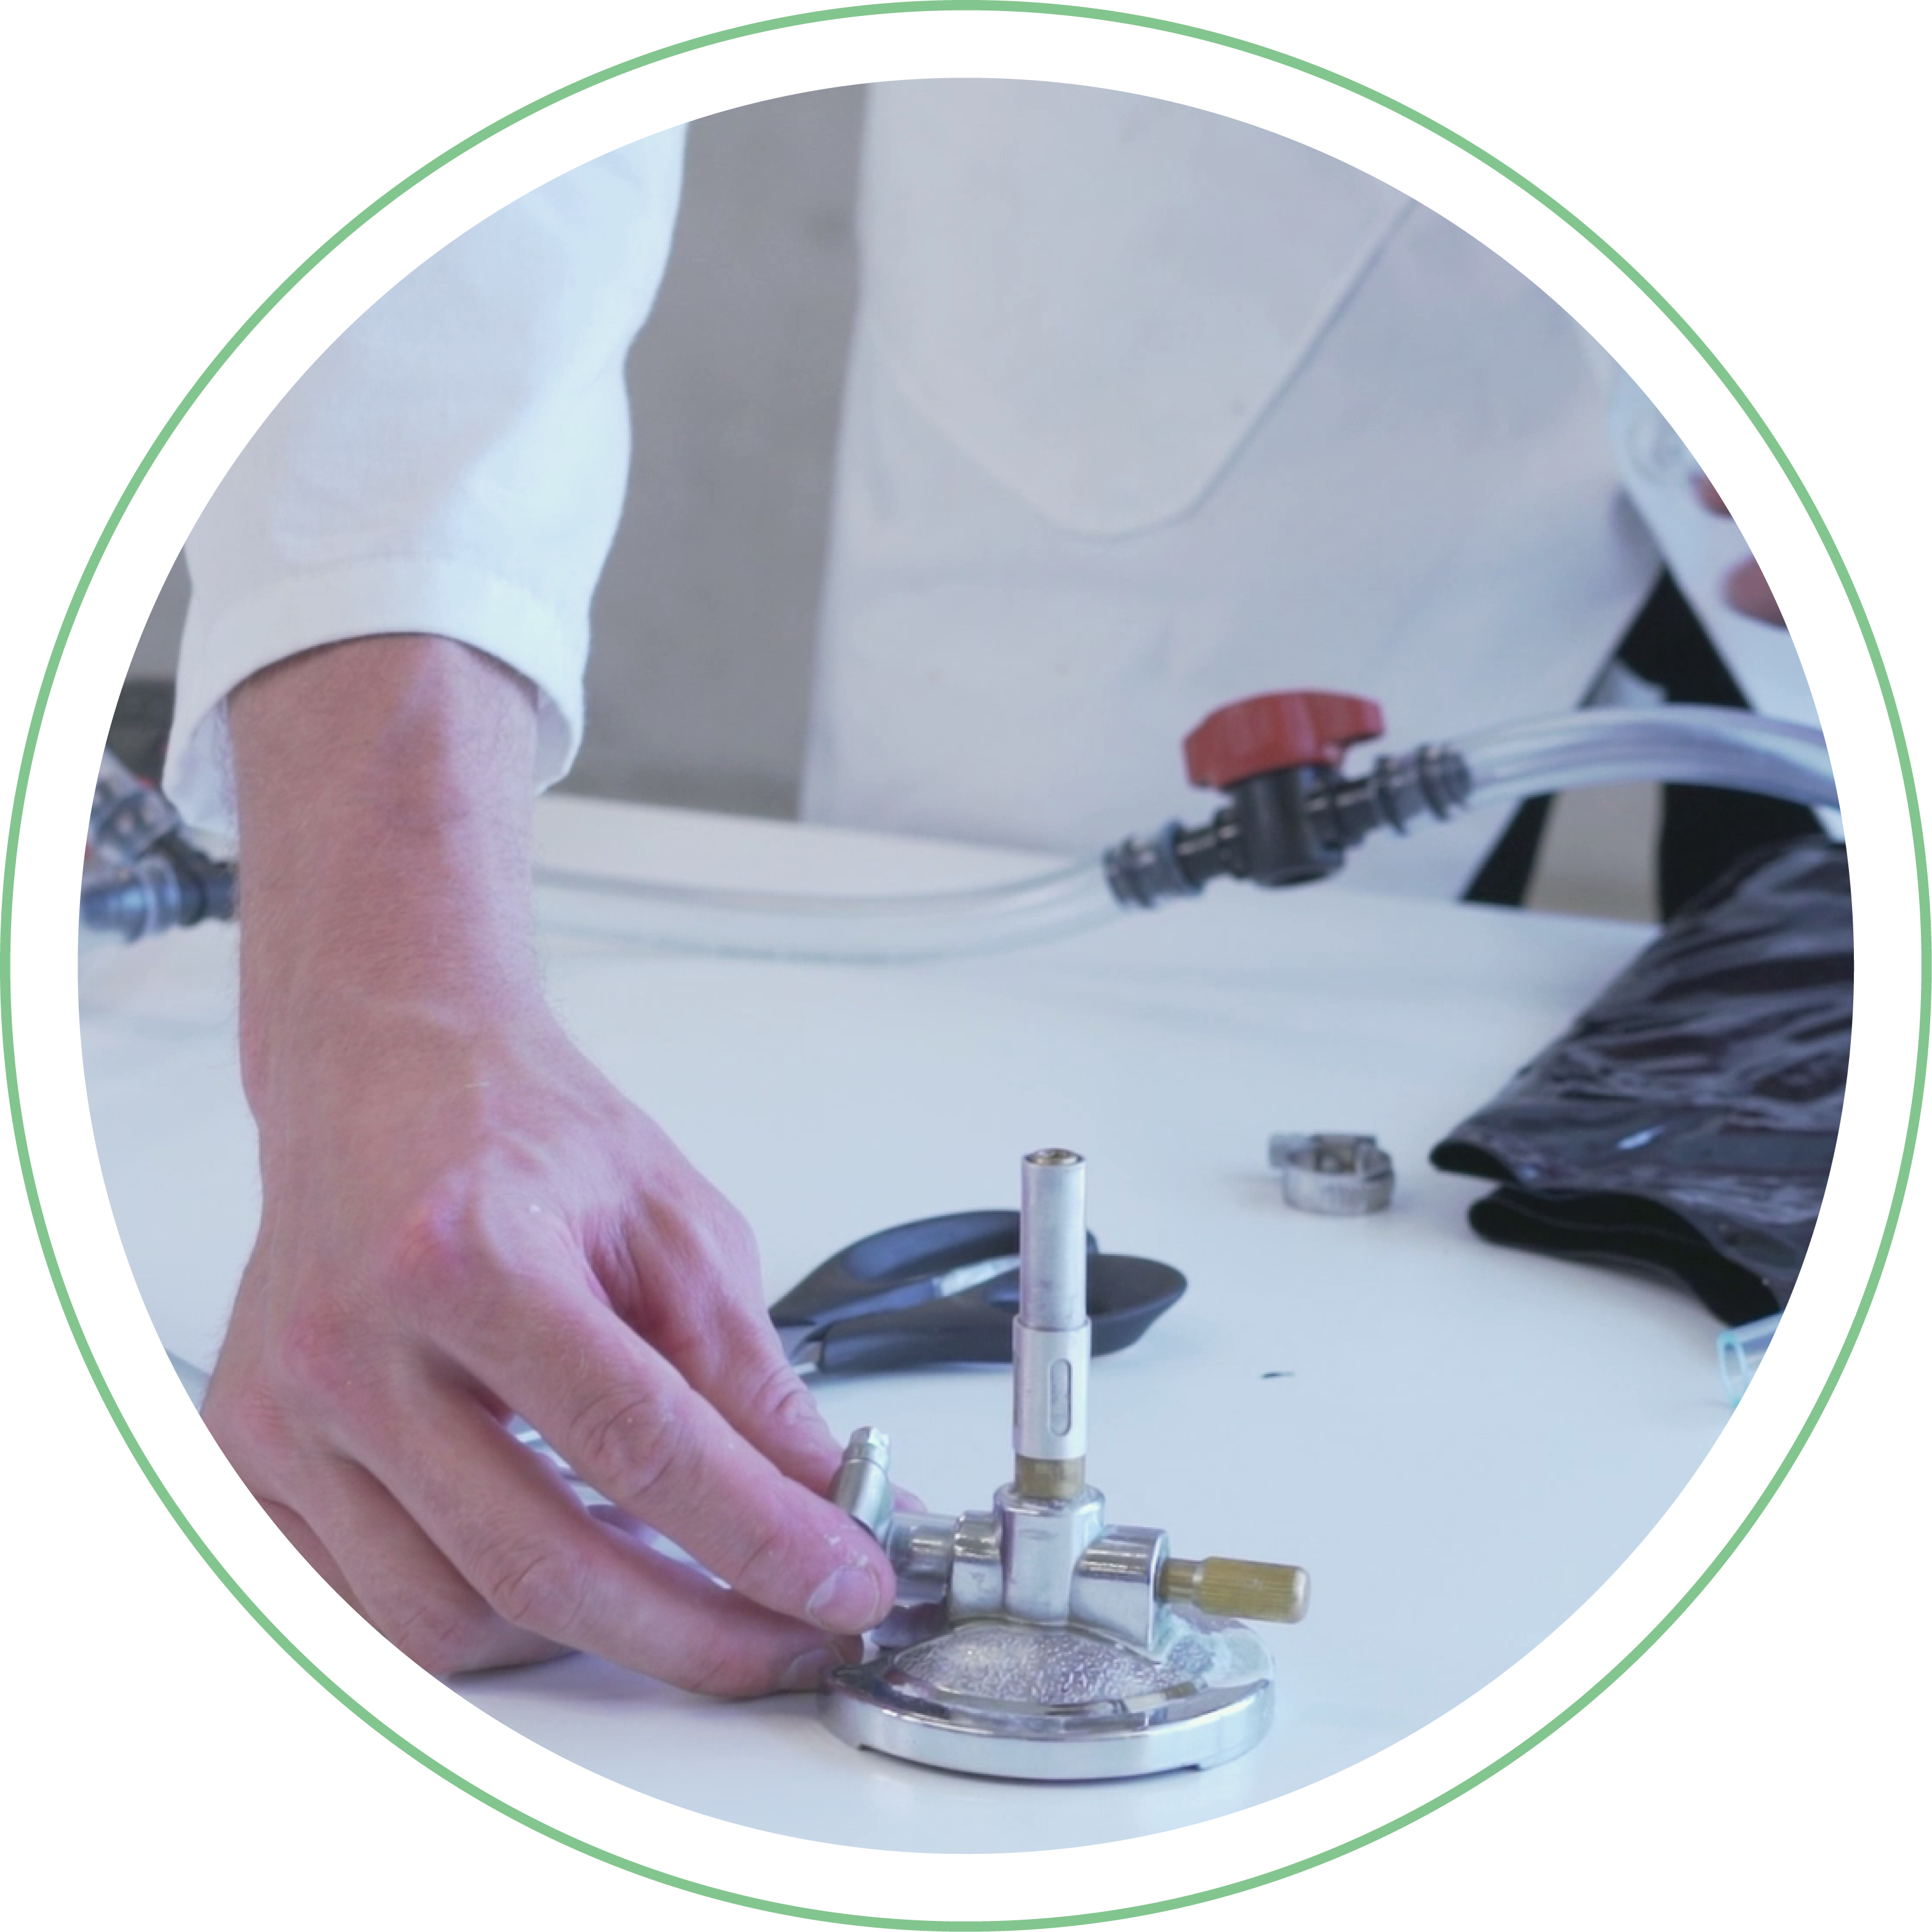
Place a metal clamp on the end of the tube and insert a flow control valve. Tighten the clamp with a screw so the connector doesn’t move. Do the same on the other side with a short piece of tube. Connect the free part to the connector of the glass jar that has a piece of tube attached to it on the inside and secure it with another metal clamp.
Grab a piece of tube and slightly burn one of the ends, and rapidly insert it into the remaining connector. Put a T connector on the other side of the tube and place a piece of tube on each of the free outlets. Leave the middle one free for the safety bottle and attach another T connector on the other tube. Place two more pieces of tube on each end and finally put two more at the ends.
Finally, connect two other transparent tubes to the Bunsen burner, through which the gas will come out, and to the air chamber, where the gas will be stored. Secure both ends with a metal clamp each.
Step 5
Ready to flame
Insert the remaining piece of tube into the previously cut safety bottle and fill it with water to the top. The mini biodigester is ready to work!
Step 1
Bioreactor
Mix the manure with the water in the same proportion until everything is dissolved. Grab the 20 L water bottle and pass the tube through the lid, and glue it. Now, pour the manure mixture into the bottle and glue the lid, leaving a tiny piece of tube inside the bottle. Next, secure the rest of the tube to the bottle with tape so it doesn’t move and it’s at the right height.
Step 2
Sulfuric filter
Grab the glass jar and make two holes in the lid with the size of the male-male hose pipe connector using the drill with the crown drill bit attached. Make sure the connectors fit into the holes, and glue them with the silicone gun. In the inside of the lid, attach the female-female hose pipe connectors into the male ones and glue again to ensure it is secured. On the outside part of the lid, screw the female hose connectors into the male ones.
Step 3
Safety bottle
Grab the 1.5 L water bottle and cut off the top using the box cutter. Put that aside. This bottle will serve as a safety component, because it will be filled with water and one of the ends of the tubes will be submerged there. If the gas comes out with a lot of pressure, there will be bubbles, alerting that the camera is full, so it has to be changed in order to collect more biogas.
Step 4
Assembling
Place a metal clamp on the end of the tube and insert a flow control valve. Tighten the clamp with a screw so the connector doesn’t move. Do the same on the other side with a short piece of tube. Connect the free part to the connector of the glass jar that has a piece of tube attached to it in the inside and secure it with another metal clamp.
Step 5
Ready to flame
Insert the remaining piece of tube into the safety bottle previously cut and fill it with water to the top. The mini biodigester is ready to work!